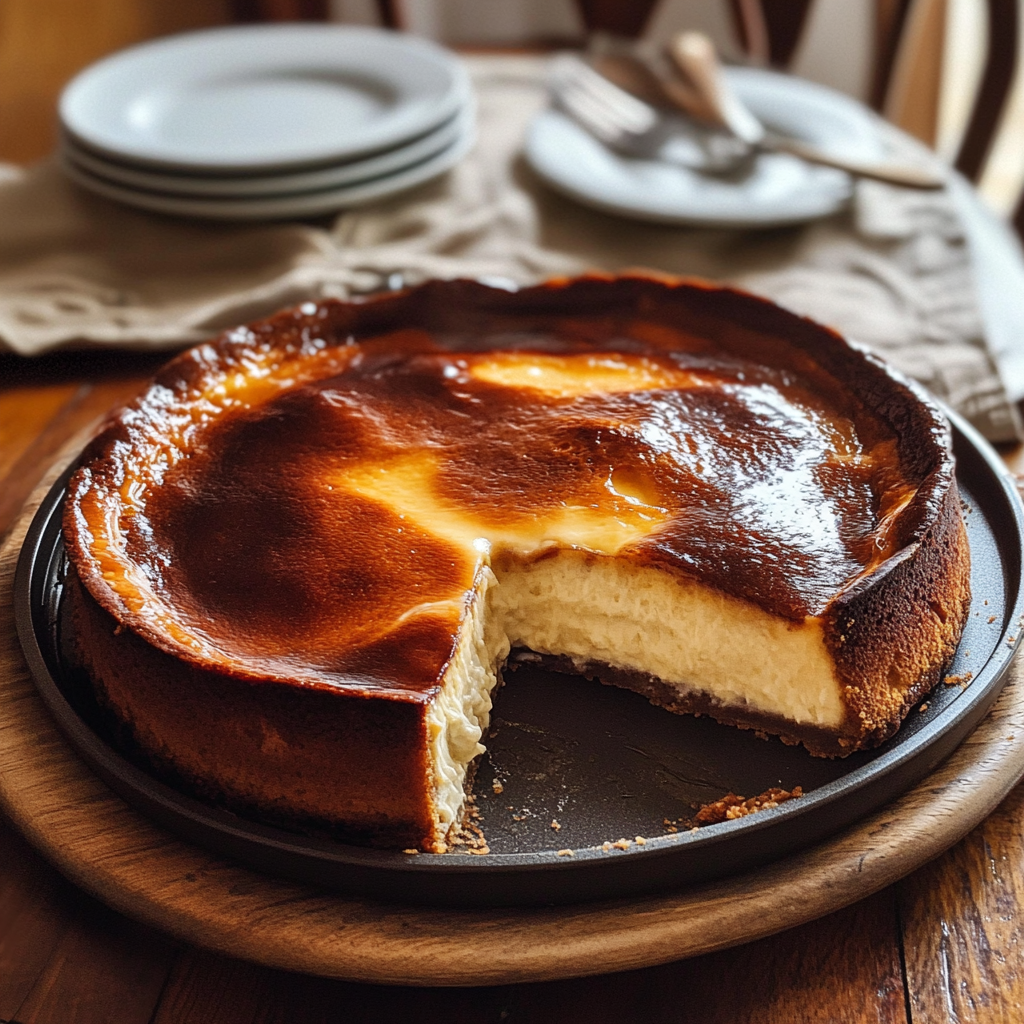
Burnt Basque Cheesecake, also known as “La Viña Cheesecake,” is a rustic, crustless dessert that has taken the culinary world by storm. Originating from San Sebastián, Spain, this cheesecake is intentionally baked at a high temperature to achieve its signature caramelized, burnt exterior while keeping the center rich, creamy, and almost custard-like. Its simplicity and bold flavors make it a dessert that is both comforting and elegant. With only a handful of ingredients and a fuss-free preparation, Burnt Basque Cheesecake is perfect for novice bakers and seasoned pros alike. Whether for a family gathering or a special occasion, it’s a showstopper dessert.
Why You’ll Love This Recipe
- Effortless Preparation: No water baths, crusts, or fancy equipment required.
- Rich and Creamy Texture: A luscious interior with a caramelized, slightly bitter crust.
- Unique Flavor: A perfect balance of sweet, tangy, and smoky notes.
- Versatile Dessert: Ideal for casual family meals or as the star of a sophisticated dinner party.
- Globally Adored: Loved for its rustic appearance and unparalleled taste.
Preparation Time and Servings
- Prep Time: 10 minutes
- Cook Time: 55 minutes
- Cooling Time: 2–4 hours
- Total Time: 3–5 hours (including cooling)
- Yield: 8 servings
- Serving Size: 1 slice (approximately 125g)
Nutritional Information (per serving)
- Calories: 320
- Carbohydrates: 23g
- Protein: 7g
- Fat: 23g
- Fiber: 0g
- Sugar: 18g
Ingredients
- 2 cups (16 oz) cream cheese, softened
- ¾ cup (150g) granulated sugar
- 3 large eggs, at room temperature
- 1 ½ cups (360ml) heavy cream
- 2 tbsp (16g) all-purpose flour
- ½ tsp salt
- 1 tsp pure vanilla extract
Step-by-Step Instructions
1. Preheat the Oven
- Preheat your oven to 400°F (200°C). Line an 8-inch springform pan with parchment paper, allowing the edges to extend above the pan to prevent sticking.
2. Beat the Cream Cheese
- In a large mixing bowl, use a hand mixer or stand mixer to beat the cream cheese and sugar until smooth and creamy, about 2–3 minutes. Scrape down the sides of the bowl as needed.
3. Add the Eggs
- Add the eggs one at a time, mixing well after each addition. This ensures a smooth batter without lumps.
4. Incorporate the Cream and Flavorings
- Slowly pour in the heavy cream while mixing on low speed. Add the vanilla extract and salt, blending until fully incorporated.
5. Sift in the Flour
- Sift the flour over the batter and fold gently with a spatula. Be careful not to overmix.
6. Pour and Bake
- Pour the batter into the prepared pan, smoothing the top with a spatula. Bake for 50–55 minutes, or until the top is deeply browned and puffed. The center should jiggle slightly when the pan is shaken.
7. Cool the Cheesecake
- Allow the cheesecake to cool in the pan for 2–4 hours. It will deflate slightly and develop a creamy, custard-like texture as it sets.
8. Serve and Enjoy
- Carefully remove the cheesecake from the pan and peel away the parchment paper. Slice and serve at room temperature or slightly chilled.
Ingredient Background
- Cream Cheese: The base of this cheesecake, providing a rich and tangy foundation. Use full-fat cream cheese for the best texture.
- Heavy Cream: Adds creaminess and helps create the custard-like center. Avoid substitutes like half-and-half, as they lack the necessary fat content.
- Eggs: Act as a binding agent and contribute to the creamy consistency. Room temperature eggs blend more evenly into the batter.
- Flour: A small amount stabilizes the batter while maintaining the cheesecake’s signature lightness.
- Vanilla Extract: Enhances the overall flavor with warm, aromatic notes. Pure vanilla is recommended for optimal taste.
Technique Tips
- Room Temperature Ingredients: Ensure all ingredients are at room temperature to create a smooth batter and prevent lumps.
- Proper Lining: Use parchment paper that extends above the pan to catch any batter overflow and make it easier to remove the cheesecake.
- Do Not Overbake: The cheesecake should have a deeply browned top but a slightly jiggly center. Overbaking can lead to a dry texture.
- Cooling Time: Allow ample time for the cheesecake to cool and set. Rushing this step can compromise its creamy texture.
Alternative Presentation Ideas
- Mini Cheesecakes: Divide the batter into individual ramekins for personal servings. Adjust the baking time to 25–30 minutes.
- Layered Cheesecake: Add a layer of fruit preserves, chocolate ganache, or caramel sauce over the cooled cheesecake for extra flavor.
- Glazed Top: Brush a thin layer of honey or apricot glaze over the burnt crust for a glossy finish.
- Decorative Piping: Pipe whipped cream rosettes around the edges for an elegant touch.
Additional Tips for Success
- Use a Springform Pan: This makes it easier to remove the cheesecake without damaging its delicate structure.
- Watch the Oven: Ovens vary in heat distribution, so keep an eye on the cheesecake during the last 10 minutes of baking to prevent over-browning.
- Rest Before Cutting: Let the cheesecake rest for at least 2 hours to ensure clean slices.
- Knife Cleaning: Wipe your knife clean after each cut for neat, professional-looking slices.
Recipe Variations
- Chocolate Burnt Basque Cheesecake: Add ½ cup of melted dark chocolate to the batter for a rich chocolate version.
- Matcha Flavor: Sift in 1 tablespoon of matcha powder for a green tea twist.
- Citrus Infusion: Add the zest of one lemon or orange to brighten the flavor.
- Spiced Cheesecake: Mix in a pinch of cinnamon, nutmeg, or cardamom for a warm, spiced variation.
- Low-Sugar Option: Replace sugar with a sugar substitute, such as erythritol or monk fruit sweetener, for a keto-friendly dessert.
Freezing and Storage
- Refrigeration: Store the cheesecake in an airtight container in the refrigerator for up to 4 days. Serve chilled or bring to room temperature before serving.
- Freezing: Wrap the cheesecake tightly in plastic wrap and aluminum foil, then freeze for up to 3 months. Thaw in the refrigerator overnight before enjoying.
Healthier Twist Ideas
- Use Greek Yogurt: Substitute part of the cream cheese with plain Greek yogurt for a slightly lighter texture.
- Reduce Sugar: Use natural sweeteners like honey or maple syrup instead of granulated sugar.
- Low-Fat Cream Cheese: Swap full-fat cream cheese with a reduced-fat version for fewer calories.
- Almond Flour: Replace all-purpose flour with almond flour for a gluten-free alternative.
Serving Suggestions for Events
- Dinner Parties: Pair with fresh berries and a drizzle of caramel or berry coulis for a show-stopping dessert.
- Casual Gatherings: Serve alongside coffee or tea for a cozy treat.
- Festive Occasions: Decorate with edible flowers or gold leaf for an elegant holiday presentation.
- Breakfast or Brunch: Slice thinly and pair with fresh fruit and a dollop of whipped cream for a decadent morning treat.
Special Equipment
- Springform Pan: Essential for easy removal of the cheesecake.
- Parchment Paper: Prevents sticking and makes cleanup effortless.
- Hand Mixer or Stand Mixer: Ensures a smooth, lump-free batter.
- Cooling Rack: Allows the cheesecake to cool evenly.
Frequently Asked Questions
Q1: Why is the top of my cheesecake too dark?
Ensure your oven temperature is accurate. If the top browns too quickly, tent the cheesecake with foil during the last 10 minutes of baking.
Q2: Can I use low-fat cream cheese?
Yes, but the texture may be slightly less creamy. Full-fat cream cheese is recommended for the authentic texture.
Q3: Is it normal for the cheesecake to crack?
Yes, cracks are part of the rustic charm of Burnt Basque Cheesecake and do not affect its taste or texture.
Q4: Can I bake this in a smaller or larger pan?
Yes, adjust the baking time accordingly. A larger pan will yield a thinner cheesecake and require less time, while a smaller pan will produce a thicker cheesecake and need more time.
Q5: How can I prevent lumps in the batter?
Ensure all ingredients are at room temperature and mix thoroughly but gently.
Q6: Is the flour essential?
Flour helps stabilize the batter but can be omitted for a gluten-free cheesecake. The texture will be slightly softer.
Q7: Can I make this ahead of time?
Yes, Burnt Basque Cheesecake tastes even better the next day. Prepare it a day in advance and refrigerate until serving.
Q8: What sauces pair well with this cheesecake?
Berry compotes, salted caramel, chocolate ganache, or citrus curds all complement the cheesecake beautifully.
Conclusion
Burnt Basque Cheesecake is a testament to the beauty of simplicity. Its creamy texture, caramelized crust, and rich flavor make it a dessert that is both indulgent and easy to prepare. Perfect for any occasion, from casual gatherings to festive celebrations, this rustic cheesecake is a guaranteed crowd-pleaser. With endless customization options and foolproof techniques, Burnt Basque Cheesecake is destined to become a favorite in your recipe repertoire. Pair it with fresh berries, a drizzle of honey, or a dusting of powdered sugar to elevate its charm. Give it a try and experience the magic of this iconic dessert firsthand!
Print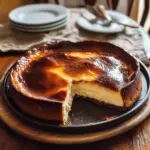
Burnt Basque Cheesecake
- Total Time: 3-5 hours
- Yield: 8 servings 1x
Ingredients
- 2 cups (16 oz) cream cheese, softened
- ¾ cup (150g) granulated sugar
- 3 large eggs, at room temperature
- 1 ½ cups (360ml) heavy cream
- 2 tbsp (16g) all-purpose flour
- ½ tsp salt
- 1 tsp pure vanilla extract
Instructions
1. Preheat the Oven
- Preheat your oven to 400°F (200°C). Line an 8-inch springform pan with parchment paper, allowing the edges to extend above the pan to prevent sticking.
2. Beat the Cream Cheese
- In a large mixing bowl, use a hand mixer or stand mixer to beat the cream cheese and sugar until smooth and creamy, about 2–3 minutes. Scrape down the sides of the bowl as needed.
3. Add the Eggs
- Add the eggs one at a time, mixing well after each addition. This ensures a smooth batter without lumps.
4. Incorporate the Cream and Flavorings
- Slowly pour in the heavy cream while mixing on low speed. Add the vanilla extract and salt, blending until fully incorporated.
5. Sift in the Flour
- Sift the flour over the batter and fold gently with a spatula. Be careful not to overmix.
6. Pour and Bake
- Pour the batter into the prepared pan, smoothing the top with a spatula. Bake for 50–55 minutes, or until the top is deeply browned and puffed. The center should jiggle slightly when the pan is shaken.
7. Cool the Cheesecake
- Allow the cheesecake to cool in the pan for 2–4 hours. It will deflate slightly and develop a creamy, custard-like texture as it sets.
8. Serve and Enjoy
- Carefully remove the cheesecake from the pan and peel away the parchment paper. Slice and serve at room temperature or slightly chilled.
- Prep Time: 10 minutes
- Cooling Time: 2-4 hours
- Cook Time: 55 minutes
Nutrition
- Serving Size: 1 slice (approximately 125g)
- Calories: 320
- Sugar: 18g
- Fat: 23g
- Carbohydrates: 23g
- Fiber: 0g
- Protein: 7g