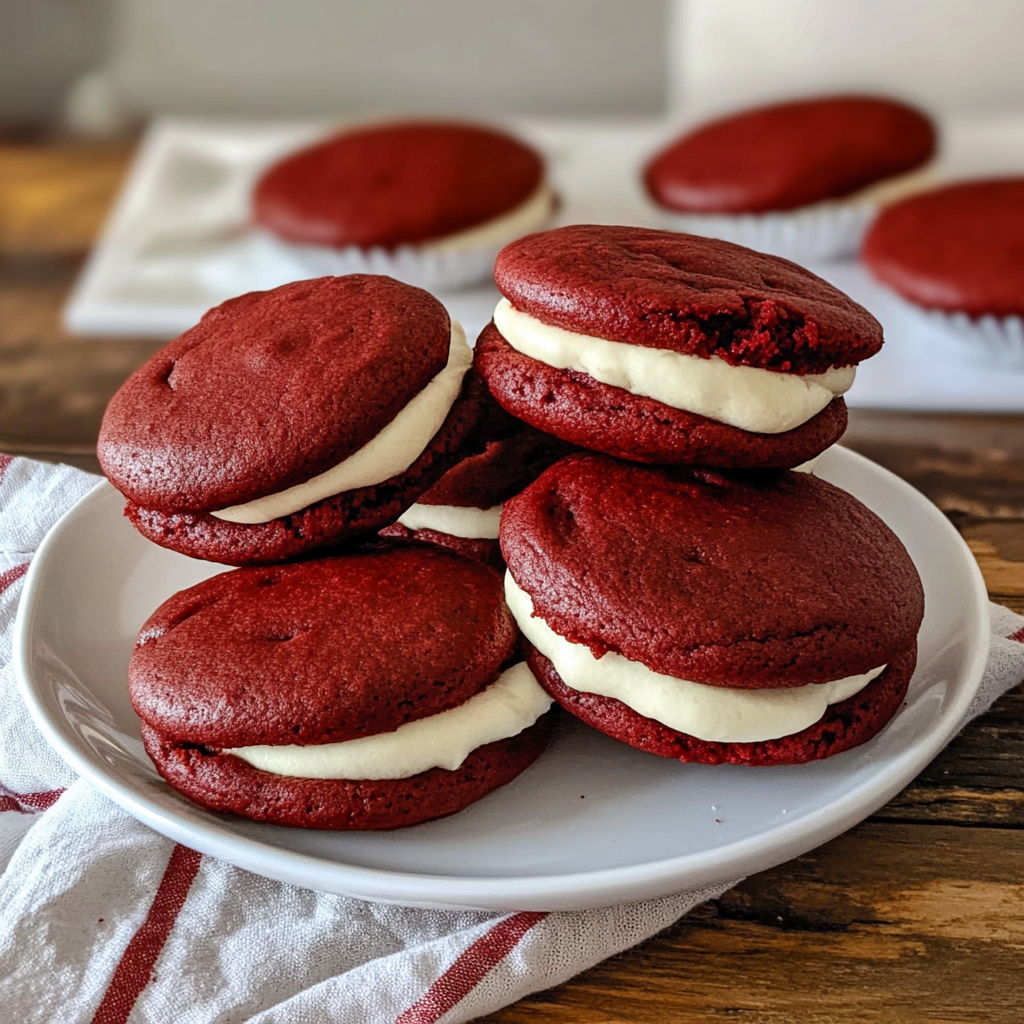

Red Velvet Whoopie Pies are the perfect fusion of two classic desserts: the rich, velvety flavor of red velvet cake and the comforting, handheld joy of a whoopie pie. These decadent treats consist of two fluffy red velvet cake-like cookies sandwiched with a luscious cream cheese filling. Perfect for holidays, special occasions, or even casual gatherings, they’re guaranteed to wow both kids and adults alike. This recipe will guide you through every step to create these delightful sandwiches, along with tips, tricks, and variations to make them uniquely yours. Whether you’re a seasoned baker or a novice, you’ll find this recipe approachable and utterly irresistible.
Why You’ll Love This Recipe
- These Red Velvet Whoopie Pies are visually stunning, with their bright red cookies and creamy white filling.
- The handheld, individual serving size makes them perfect for parties and gatherings.
- The combination of soft, cake-like cookies and tangy-sweet cream cheese filling is irresistible.
- This recipe includes detailed step-by-step instructions, making it approachable for beginners.
- Creative variations are included to help you customize the recipe to your taste or theme.
- They’re versatile desserts, suitable for holidays like Valentine’s Day, Christmas, or even birthdays.
- You can easily adapt them to different dietary needs with simple substitutions.
Ingredients
For the Red Velvet Cookies:
- 2 ½ cups all-purpose flour
- 2 tablespoons unsweetened cocoa powder
- 1 teaspoon baking powder
- ½ teaspoon baking soda
- ¼ teaspoon salt
- ½ cup unsalted butter, softened
- ½ cup granulated sugar
- ½ cup packed light brown sugar
- 1 large egg, at room temperature
- 1 teaspoon pure vanilla extract
- 1 teaspoon distilled white vinegar
- 2 teaspoons red food coloring (gel recommended for vibrant color)
- ¾ cup buttermilk, at room temperature
For the Cream Cheese Filling:
- 8 ounces cream cheese, softened
- 4 tablespoons unsalted butter, softened
- 2 cups powdered sugar, sifted
- 1 teaspoon pure vanilla extract
Step-by-Step Instructions
Step 1: Prepare the Dough
- Preheat the oven: Set the oven to 350°F (175°C) and line two baking sheets with parchment paper.
- Mix dry ingredients: Whisk together flour, cocoa powder, baking powder, baking soda, and salt in a medium bowl.
- Cream butter and sugars: Use a mixer to beat the butter, granulated sugar, and brown sugar together until light and fluffy, about 2-3 minutes.
- Add wet ingredients: Beat in the egg, vanilla extract, vinegar, and red food coloring until well combined.
- Combine wet and dry ingredients: Alternate adding the dry ingredients and buttermilk to the wet mixture, starting and ending with the dry ingredients. Mix until just combined.
Step 2: Bake the Cookies
- Scoop the dough: Use a small cookie scoop (about 1 ½ tablespoons) to portion out the dough onto the prepared baking sheets. Space the cookies about 2 inches apart.
- Bake: Bake for 10-12 minutes or until the edges are set and the tops spring back when lightly touched.
- Cool the cookies: Let them cool on the baking sheets for 5 minutes, then transfer them to a wire rack to cool completely.
Step 3: Make the Cream Cheese Filling
- Mix cream cheese and butter: Beat the softened cream cheese and butter together until smooth and creamy.
- Add powdered sugar and vanilla: Gradually beat in the sifted powdered sugar, ½ cup at a time, and stir in the vanilla extract. Beat until fluffy.
Step 4: Assemble the Whoopie Pies
- Match cookies: Pair cookies of similar size together for a uniform look.
- Fill: Pipe or spread 1 ½ tablespoons of cream cheese filling onto the flat side of one cookie.
- Assemble sandwiches: Top with another cookie, pressing gently to form a sandwich.
- Chill to set: Place the whoopie pies in the refrigerator for 20-30 minutes to allow the filling to firm up.
Ingredient Background
- All-purpose flour: Creates structure for the soft, cake-like texture.
- Cocoa powder: A small amount of cocoa adds subtle chocolate undertones, a key element of red velvet desserts.
- Buttermilk: Adds moisture and tangy flavor while activating the baking soda for a tender texture.
- Distilled white vinegar: Enhances the red color and balances the sweetness with acidity.
- Cream cheese: Its tangy richness makes it the ideal filling for complementing the slightly sweet cookies.
Technique Tips
- Measure accurately: Use the spoon-and-level method to measure flour to avoid dense cookies.
- Use room-temperature ingredients: This ensures a smooth batter and even baking.
- Prevent overmixing: Mix the batter just until the ingredients are combined to keep the cookies soft and fluffy.
- Chill if necessary: If the dough feels too soft, chill it for 15-20 minutes before scooping.
Alternative Presentation Ideas
- Mini whoopie pies: Use a teaspoon-sized scoop to make smaller, bite-sized sandwiches.
- Holiday-themed shapes: Pipe the batter into heart or star shapes for festive occasions.
- Decorative edges: Roll the filling edges in sprinkles, crushed nuts, or mini chocolate chips for added texture and flair.
Additional Tips for Success
- Avoid overbaking: Keep an eye on the cookies as they bake to ensure they stay soft and tender.
- Use gel food coloring: For a vibrant red hue, gel food coloring works best without affecting the consistency of the batter.
- Refrigerate leftovers: Store the whoopie pies in an airtight container in the fridge to maintain freshness.
- Pipe the filling neatly: Use a piping bag for a clean and professional look when applying the cream cheese filling.
Recipe Variations
- Chocolate ganache filling: Swap the cream cheese filling for a rich ganache for a double-chocolate twist.
- Peppermint filling: Add ½ teaspoon of peppermint extract to the filling for a festive flavor.
- Gluten-free option: Replace the all-purpose flour with a gluten-free 1:1 baking mix.
- Vegan adaptation: Use plant-based butter, cream cheese, and a non-dairy buttermilk substitute made with vinegar and almond milk.
Freezing and Storage
- Freeze unfilled cookies: Place cooled cookies on a baking sheet and freeze for 1 hour, then store in a freezer-safe bag for up to 2 months. Thaw before assembling.
- Freeze assembled pies: Wrap each whoopie pie in plastic wrap and store in an airtight container in the freezer for up to 1 month. Thaw in the refrigerator before serving.
- Refrigerate leftovers: Store assembled whoopie pies in the fridge for up to 3 days in an airtight container.
Healthier Twist Ideas
- Reduce sugar: Decrease the sugar in both the cookies and filling by ¼ cup to cut back on sweetness.
- Whole wheat flour: Substitute half the all-purpose flour with whole wheat flour for added fiber.
- Low-fat cream cheese: Use low-fat cream cheese to reduce the fat content of the filling.
Serving Suggestions for Events
- Holiday platters: Decorate the whoopie pies with themed sprinkles or edible glitter for festive gatherings.
- Party favors: Wrap individually in cellophane with ribbons for a thoughtful takeaway gift.
- Dessert spreads: Arrange them on a tiered tray alongside other small desserts for an eye-catching display.
Special Equipment
- Cookie scoop: Ensures evenly sized cookies for uniform whoopie pies.
- Piping bag and tip: For clean and professional filling application.
- Cooling rack: Speeds up the cooling process and prevents soggy bottoms.
Frequently Asked Questions
- 1. Can I make the cookies ahead of time? Yes, the cookies can be baked 1-2 days in advance and stored at room temperature in an airtight container until ready to assemble.
- 2. Can I use liquid food coloring? Yes, but gel food coloring is more concentrated and produces a richer color without altering the batter’s consistency.
- 3. How can I prevent my cookies from spreading? Ensure the butter is softened, not melted, and chill the dough if it feels too soft.
- 4. What’s a good substitute for buttermilk? Make your own by mixing ¾ cup milk with 1 tablespoon of vinegar or lemon juice and letting it sit for 5 minutes.
- 5. Can I freeze the whoopie pies? Yes, both the cookies and assembled pies can be frozen. See the “Freezing and Storage” section for detailed instructions.
- 6. How do I thicken a runny cream cheese filling? Chill the filling in the refrigerator for 15-20 minutes, or add more sifted powdered sugar until it reaches the desired consistency.
- 7. How long do the whoopie pies stay fresh? They stay fresh for up to 3 days in the refrigerator when stored in an airtight container.
- 8. Can I double the recipe? Absolutely! This recipe doubles well for larger gatherings or events.
Conclusion
Red Velvet Whoopie Pies combine the elegance of red velvet cake with the fun and convenience of handheld treats. Their soft, pillowy cookies and rich cream cheese filling make them an irresistible dessert for any occasion. With this comprehensive guide, you’ll be able to bake perfect whoopie pies that are sure to impress family and friends. Enjoy the process and the delicious results!
Print
Red Velvet Whoopie Pies
- Author: Amelia
- Total Time: 1 hour (including cooling and assembly time)
- Yield: 12 whoopie pies 1x
Ingredients
For the Red Velvet Cookies:
- 2 ½ cups all-purpose flour
- 2 tablespoons unsweetened cocoa powder
- 1 teaspoon baking powder
- ½ teaspoon baking soda
- ¼ teaspoon salt
- ½ cup unsalted butter, softened
- ½ cup granulated sugar
- ½ cup packed light brown sugar
- 1 large egg, at room temperature
- 1 teaspoon pure vanilla extract
- 1 teaspoon distilled white vinegar
- 2 teaspoons red food coloring (gel recommended for vibrant color)
- ¾ cup buttermilk, at room temperature
For the Cream Cheese Filling:
- 8 ounces cream cheese, softened
- 4 tablespoons unsalted butter, softened
- 2 cups powdered sugar, sifted
- 1 teaspoon pure vanilla extract
Instructions
Step 1: Prepare the Dough
- Preheat the Oven: Preheat your oven to 350°F (175°C) and line two baking sheets with parchment paper.
- Mix Dry Ingredients: In a medium bowl, whisk together the flour, cocoa powder, baking powder, baking soda, and salt. Set aside.
- Cream Butter and Sugars: In a large mixing bowl, use a hand mixer or stand mixer to cream the softened butter, granulated sugar, and brown sugar together until light and fluffy, about 2-3 minutes.
- Add Wet Ingredients: Beat in the egg, vanilla extract, vinegar, and red food coloring. Mix until fully combined, ensuring the color is evenly distributed.
- Incorporate Dry Ingredients and Buttermilk: Gradually add the dry ingredients to the wet mixture, alternating with the buttermilk. Start and end with the dry ingredients, mixing just until combined. Avoid overmixing to maintain a tender texture.
Step 2: Bake the Cookies
- Scoop and Shape: Use a small cookie scoop (about 1 ½ tablespoons) to portion the dough onto the prepared baking sheets, spacing them 2 inches apart.
- Bake: Bake the cookies for 10-12 minutes, or until the edges are set and the tops spring back when lightly touched. Avoid overbaking for soft, cake-like cookies.
- Cool: Allow the cookies to cool on the baking sheets for 5 minutes before transferring them to a wire rack to cool completely.
Step 3: Prepare the Cream Cheese Filling
- Beat the Cream Cheese and Butter: In a mixing bowl, beat the softened cream cheese and butter together until smooth and creamy.
- Add Powdered Sugar and Vanilla: Gradually add the sifted powdered sugar, ½ cup at a time, mixing on low speed to avoid a sugar cloud. Stir in the vanilla extract and beat on medium speed until fluffy.
Step 4: Assemble the Whoopie Pies
- Match Cookies: Pair up the cookies by size for a uniform look.
- Fill: Pipe or spread about 1 ½ tablespoons of cream cheese filling onto the flat side of one cookie. Top with a matching cookie, pressing gently to create a sandwich.
- Chill: For best results, chill the assembled whoopie pies in the refrigerator for 20-30 minutes to set the filling.
- Prep Time: 20 minutes
- Cook Time: 12 minutes
Nutrition
- Serving Size: 1 whoopie pie
- Calories: 320
- Sugar: 28g
- Fat: 15g
- Carbohydrates: 42g
- Fiber: 1g
- Protein: 4g